
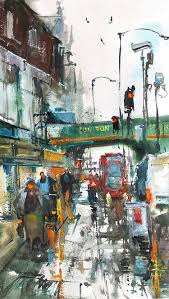
Painting: A Timeless Art Form
Painting, an art form that has stood the test of time, holds a special place in the hearts of art enthusiasts worldwide. From cave paintings dating back thousands of years to modern masterpieces adorning gallery walls, painting continues to captivate and inspire.
At its core, painting is a means of expression, allowing artists to communicate their thoughts, emotions, and perspectives through the stroke of a brush or the application of color onto a canvas. It offers a unique way to capture moments in time, immortalizing them for generations to come.
One of the beauties of painting lies in its versatility. Artists can choose from a wide range of mediums such as oil, acrylic, watercolor, or even mixed media to bring their visions to life. Each medium offers its own distinct characteristics and challenges, providing endless possibilities for creativity and experimentation.
Painting also allows artists to explore various styles and techniques. From realism to abstract expressionism, impressionism to surrealism, there is no limit to the artistic approaches one can take. Each style carries its own aesthetic appeal and conveys different messages or emotions.
Engaging in painting not only brings joy and fulfillment to the artist but also provides viewers with an opportunity for introspection and connection. A well-executed painting has the power to evoke strong emotions within its audience – whether it be awe-inspiring landscapes that transport us into another world or thought-provoking abstract compositions that challenge our perceptions.
Moreover, painting serves as a window into different cultures and historical periods. Throughout history, artists have used their brushes as tools for social commentary or as reflections of their cultural heritage. By studying paintings from different eras and regions, we gain insights into the beliefs, values, and experiences of those who came before us.
In today’s digital age where technology dominates many aspects of our lives, painting remains a cherished tradition that encourages mindfulness and creativity. It provides a much-needed respite from the fast-paced world, allowing individuals to slow down, focus their attention, and immerse themselves in the act of creation.
Whether you are an aspiring artist or an appreciator of art, painting offers a wealth of benefits. It encourages self-expression, fosters imagination, improves cognitive skills, and promotes emotional well-being. It is a medium through which we can connect with others, share our stories, and leave a lasting legacy.
So why not pick up a brush and explore the world of painting? Allow yourself to be swept away by the colors, textures, and endless possibilities that this timeless art form has to offer. Whether you create masterpieces or simply find solace in the process, painting is an enriching journey that can bring beauty and fulfillment into your life.
8 Essential Tips for Successful Painting
- Prepare the surface properly. Clean and sand any existing paint and fill in any holes or cracks.
- Use quality materials. Invest in good brushes, rollers, and paint to ensure a professional finish.
- Choose the right type of paint for your project. Consider factors such as the surface you are painting, the environment it will be exposed to, and your desired finish when selecting your paint type (e.g., gloss, semi-gloss, matte).
- Protect areas that should not be painted with painter’s tape or drop cloths/tarps before starting your project.
- Start with a coat of primer before applying any color coats of paint to ensure better adhesion and coverage of the final product; this is especially important when painting over a dark color with a lighter one or using a specialty finish such as metallic or high-gloss paints that require more preparation than standard latex paints do .
- Work from top to bottom when painting walls and ceilings; this will help prevent drips from forming on already painted sections below them while you work on higher sections of wall/ceiling space above them
- Apply thin coats of paint rather than thick layers; if too much is applied at once it can cause runs or drips which can ruin an otherwise perfect job
- Allow each coat time to dry completely before applying another layer for best results
Prepare the surface properly. Clean and sand any existing paint and fill in any holes or cracks.
Preparing the Surface: The Key to a Successful Painting Project
When it comes to painting, proper surface preparation is an essential step that should never be overlooked. Taking the time to clean, sand, and repair any imperfections on the surface ensures a smooth and long-lasting finish. So, before you dip that brush into a can of paint, let’s explore why preparing the surface properly is crucial for a successful painting project.
First and foremost, cleaning the surface is essential. Dust, dirt, grease, and other contaminants can hinder paint adhesion and result in an uneven finish. Start by wiping down the surface with a mild detergent solution or a suitable cleaner to remove any grime or residue. Rinse thoroughly and allow it to dry completely before proceeding.
Next, inspect the surface for any existing paint that may be peeling or chipping. Use a scraper or sandpaper to remove loose paint until you reach a stable foundation. Sanding not only helps in removing old paint but also creates a roughened texture that promotes better adhesion for the new coat of paint.
In addition to addressing existing paint issues, it’s important to fill in any holes or cracks on the surface. Use an appropriate filler such as spackle or putty to patch up these imperfections. Smooth out the filler with a putty knife and allow it to dry completely before sanding it down to achieve a seamless finish.
By properly preparing the surface before painting, you ensure that your new coat of paint adheres well and provides an even appearance. It also helps in preventing future problems such as peeling or bubbling due to inadequate adhesion.
Moreover, taking the time for surface preparation allows you to assess any underlying issues that may require attention before painting. It could reveal hidden water damage, mold growth, or structural problems that need further evaluation and repair.
Properly preparing the surface not only enhances the aesthetic outcome but also saves you time and effort in the long run. A well-prepared surface allows the paint to go on smoothly, reducing the need for excessive coats and touch-ups. It also extends the lifespan of your paint job, ensuring that it remains vibrant and durable for years to come.
So, before you embark on your next painting project, remember the importance of surface preparation. Clean away dirt and grime, remove loose paint, fill in any holes or cracks, and sand down rough areas. These simple yet crucial steps will set the foundation for a successful painting endeavor, resulting in a beautiful and professional-looking finish that you can be proud of.
Use quality materials. Invest in good brushes, rollers, and paint to ensure a professional finish.
Use Quality Materials: Elevate Your Painting Experience
When it comes to painting, using quality materials can make all the difference in achieving a professional finish. Investing in good brushes, rollers, and paint not only enhances the overall outcome of your project but also enhances your painting experience.
Starting with brushes, they are the essential tools that allow you to apply paint with precision and control. Cheap or worn-out brushes can lead to uneven application, streaks, and bristle shedding, resulting in a less-than-desirable finish. By investing in high-quality brushes made from durable materials and designed for specific painting techniques, you ensure smoother strokes and better coverage.
Rollers are another crucial element for larger surface areas. Opting for well-made rollers with the appropriate nap length ensures efficient paint distribution and minimizes the appearance of lines or texture inconsistencies. A good roller will hold paint evenly and provide a smooth application across walls or other broad surfaces.
Equally important is the choice of paint itself. High-quality paints often contain better pigments and binders that result in richer colors, improved coverage, and increased durability. They also tend to have better resistance to fading, chipping, or peeling over time. Investing in premium paints may cost a bit more initially but can save you time and money in the long run by requiring fewer coats and lasting longer.
Using quality materials not only guarantees a professional-looking finish but also enhances your overall painting experience. Good brushes feel comfortable in your hand, allowing for greater control and precision as you apply each stroke. Smooth-rolling rollers make the task more efficient and less physically demanding.
Moreover, working with quality materials instills confidence in your abilities as an artist or DIY enthusiast. When you have reliable tools at hand, you can focus on unleashing your creativity without worrying about subpar results caused by inferior equipment.
So next time you embark on a painting project, consider investing in good brushes, rollers, and paint. Your efforts will be rewarded with a more satisfying painting experience and a finished product that boasts a professional touch. Remember, quality materials are not just an expense; they are an investment in the artistry and longevity of your work.
Choose the right type of paint for your project. Consider factors such as the surface you are painting, the environment it will be exposed to, and your desired finish when selecting your paint type (e.g., gloss, semi-gloss, matte).
Choosing the Right Paint: A Key to Successful Projects
When it comes to painting, selecting the right type of paint is crucial for achieving a successful and long-lasting result. Whether you’re tackling a small DIY project or planning to transform an entire room, taking into account factors such as the surface, environment, and desired finish can make all the difference.
First and foremost, consider the surface you’ll be painting. Different surfaces require different types of paint for optimal adhesion and durability. For example, if you’re painting a wooden surface, using an appropriate wood paint or primer will help protect it from moisture and ensure a smooth finish. On the other hand, when working on metal surfaces, using a specialized metal paint can prevent rusting and maintain its appearance over time.
Next, think about the environment in which your painted surface will be exposed. Will it be indoors or outdoors? Will it be subjected to high humidity or extreme temperatures? These factors play a significant role in determining the type of paint you should choose. For interior projects, latex-based paints are commonly used due to their quick drying time and low odor. Exterior projects may require more durable options such as oil-based paints that provide better resistance against weather conditions.
Additionally, consider your desired finish when selecting your paint type. The finish refers to the sheen or gloss level of the dried paint film. Different finishes offer different aesthetics and functional properties. Gloss finishes are reflective and provide a shiny appearance that is easy to clean, making them suitable for high-traffic areas like kitchens or bathrooms. Semi-gloss finishes strike a balance between shine and durability, while matte finishes provide a non-reflective appearance ideal for hiding imperfections on walls or ceilings.
Taking these factors into account will help you make an informed decision when choosing the right type of paint for your project. Remember that investing in quality paints suited for your specific needs can save you time, effort, and money in the long run. Consult with paint professionals or refer to product labels and guidelines for further assistance in making the best choice.
By choosing the appropriate paint type, you can ensure that your project not only looks visually appealing but also withstands the test of time. So, take the time to evaluate your painting needs and make an informed decision. With the right paint in hand, you’ll be well on your way to achieving a beautiful and durable finish that exceeds your expectations.
Protect areas that should not be painted with painter’s tape or drop cloths/tarps before starting your project.
Protecting Your Space: The Power of Painter’s Tape and Drop Cloths in Painting Projects
When embarking on a painting project, it’s essential to take the necessary precautions to ensure a clean and professional finish. One of the simplest yet most effective tips is to protect areas that should not be painted using painter’s tape and drop cloths or tarps.
Painter’s tape is a versatile tool that allows you to create clean, straight lines between different surfaces. It adheres easily to walls, baseboards, trim, and other surfaces, providing a barrier that prevents paint from bleeding onto areas where it shouldn’t be. By carefully applying painter’s tape along the edges of the surfaces you want to protect, you can achieve crisp lines and avoid the frustration of having to correct mistakes later.
In addition to painter’s tape, drop cloths or tarps are invaluable for safeguarding floors, furniture, and fixtures from accidental drips or spills. These protective coverings create a barrier between your painting area and surrounding objects, ensuring that no stray paint finds its way onto unintended surfaces. Whether you’re working indoors or outdoors, using drop cloths or tarps gives you peace of mind knowing that your space will remain clean and unaffected by your painting endeavors.
Before starting your project, take the time to assess which areas need protection. Identify any furniture or fixtures that cannot be moved out of the space temporarily. Cover them with drop cloths or tarps securely anchored in place. If there are areas where two different colors meet or where walls meet ceilings or baseboards, carefully apply painter’s tape along those edges for a seamless transition.
Remember to press down firmly on the edges of the painter’s tape to ensure a tight seal and prevent any paint from seeping underneath. When applying multiple coats of paint, wait until each layer is completely dry before removing and reapplying painter’s tape for subsequent coats.
By investing a little time in preparing and protecting your space, you’ll save yourself from the hassle of cleaning up accidental spills or spending extra hours fixing mistakes. Painter’s tape and drop cloths are inexpensive tools that can make a world of difference in achieving a professional-looking finish.
So, whether you’re tackling a small DIY project or revamping an entire room, don’t underestimate the power of painter’s tape and drop cloths. These simple yet effective tools will help you create clean lines, protect your surroundings, and elevate the overall quality of your painting project.
Start with a coat of primer before applying any color coats of paint to ensure better adhesion and coverage of the final product; this is especially important when painting over a dark color with a lighter one or using a specialty finish such as metallic or high-gloss paints that require more preparation than standard latex paints do .
The Importance of Primer in Painting
When it comes to painting, starting with a coat of primer is a crucial step that should not be overlooked. Primer acts as a preparatory layer between the surface and the final coats of paint, ensuring better adhesion and coverage of the end result.
One of the main reasons why primer is essential is its ability to create a smooth and even surface for the paint to adhere to. Without primer, paint may not adhere properly, resulting in an uneven finish or peeling over time. This is especially important when painting over a dark color with a lighter one or when using specialty finishes such as metallic or high-gloss paints.
Primer also helps to seal porous surfaces, preventing excessive absorption of the topcoat. This is particularly beneficial when working with materials like wood or drywall, which tend to absorb paint unevenly without proper preparation. By applying primer first, you create a barrier that allows the subsequent coats of paint to be applied more evenly and with better coverage.
Additionally, using primer can save you time and money in the long run. It acts as a foundation that enhances the durability and longevity of your paint job. With proper adhesion and coverage provided by primer, you may find that fewer coats of paint are needed to achieve the desired result. This not only saves you on paint costs but also reduces the time spent on multiple layers.
It’s important to note that different types of surfaces may require specific primers tailored to their needs. For example, there are primers designed specifically for metal surfaces or for covering stains and odors on walls. By choosing the appropriate primer for your project, you can ensure optimal results.
In conclusion, starting your painting project with a coat of primer is a wise decision that sets the stage for success. It promotes better adhesion, improves coverage, and enhances the overall durability of your finished product. So before reaching for that can of paint, take a moment to apply a coat of primer and enjoy the benefits it brings to your painting endeavors.
Work from top to bottom when painting walls and ceilings; this will help prevent drips from forming on already painted sections below them while you work on higher sections of wall/ceiling space above them
A Practical Tip for Painting: Working from Top to Bottom
When it comes to painting walls and ceilings, a simple yet effective tip is to work from top to bottom. This technique can save you time and frustration by preventing drips from forming on already painted sections below while you work on higher areas.
Starting with the highest sections of the wall or ceiling allows gravity to work in your favor. As you apply paint, any potential drips or splatters will naturally fall downward onto unpainted areas. By working your way down, you can easily catch these drips before they dry and create unsightly marks on your finished surfaces.
Not only does working from top to bottom help maintain a cleaner paint job, but it also ensures a smoother application process. When you start at the top, you have more control over the paint flow and can evenly distribute it across the surface. This prevents excessive build-up of paint in certain areas, resulting in a more uniform and professional-looking finish.
Another advantage of this technique is that it allows for better visibility and access. By tackling higher sections first, you won’t have to worry about leaning over freshly painted areas or accidentally smudging them as you reach upward. This minimizes the risk of unintentional damage and helps maintain the overall quality of your work.
Remember to take necessary precautions when working on higher sections. Use ladders or scaffolding that are stable and secure, ensuring your safety throughout the process. It’s also important to protect surfaces below by placing drop cloths or covering furniture and floors with plastic sheets.
Working from top to bottom when painting walls and ceilings is a practical approach that can save you time, effort, and potential touch-ups later on. By following this tip, you’ll achieve a neater finish while maintaining control over drips and ensuring an even distribution of paint across your surfaces. So grab your brushes, start at the top, and enjoy a smoother painting experience!
Apply thin coats of paint rather than thick layers; if too much is applied at once it can cause runs or drips which can ruin an otherwise perfect job
Mastering the Art of Thin Coats: A Key Tip for Painting
When it comes to painting, achieving a flawless finish is the ultimate goal. One valuable tip that can make a significant difference in your painting endeavors is applying thin coats of paint instead of thick layers. This simple technique can help you avoid unsightly runs or drips that have the potential to ruin an otherwise perfect job.
Why is it important to apply thin coats? The answer lies in the nature of paint itself. Paint needs time to dry and cure properly, allowing it to adhere evenly and smoothly to the surface. When too much paint is applied at once, it takes longer for the excess layers to dry, increasing the likelihood of drips or runs forming.
By using thin coats, you give each layer ample time to dry before applying another one. This not only speeds up the overall painting process but also minimizes the risk of imperfections. Thin coats allow for better control and precision, ensuring that each stroke of your brush or roller goes on smoothly and evenly.
To apply thin coats effectively, start by loading your brush or roller with a moderate amount of paint. Avoid overloading it as this can lead to excessive application. Instead, focus on spreading the paint evenly across the surface using smooth and controlled strokes.
If you’re working with a brush, use long and sweeping motions in one direction rather than short back-and-forth strokes. This helps prevent streaks and uneven coverage. For rollers, use light pressure while rolling to distribute the paint evenly without pushing too hard.
Remember, patience is key when applying thin coats. Allow each layer to dry completely before deciding whether another coat is necessary. Rushing this process can result in uneven drying and compromised results.
Applying thin coats not only prevents runs and drips but also allows for better color saturation over multiple layers. It provides an opportunity for subtle variations and depth in your finished work, enhancing its overall visual appeal.
Whether you’re painting a room, furniture, or a masterpiece on canvas, the technique of applying thin coats is a valuable skill to master. It ensures that your hard work and attention to detail shine through without any distracting flaws.
So, the next time you embark on a painting project, remember this invaluable tip: take it slow and steady, applying thin coats of paint. Your patience and precision will be rewarded with a flawless finish that showcases your artistic prowess.
Allow each coat time to dry completely before applying another layer for best results
Allowing each coat of paint to dry completely before applying another layer is a valuable tip that can greatly enhance the quality and longevity of your painting. Patience is key when it comes to creating a masterpiece.
When you apply a new layer of paint before the previous one has dried, you risk smudging or muddying the colors. Wet paint can easily mix with the fresh application, resulting in an unintentional blend that may not be visually appealing.
By allowing each coat to dry fully, you ensure that the colors remain vibrant and distinct. This also allows you to assess the true effect of each layer before proceeding, giving you the opportunity to make any necessary adjustments or corrections.
Additionally, drying time allows for proper adhesion between layers. When paint dries, it forms a strong bond with the surface beneath it. If you apply a new layer too soon, it may not adhere properly and could lead to cracking or peeling over time.
The drying time required can vary depending on factors such as the type of paint used, humidity levels, and thickness of application. It’s always best to refer to the manufacturer’s instructions for specific drying times. In general, acrylic paints dry relatively quickly compared to oil paints.
Remember that patience pays off in artistry. Allowing each coat of paint to dry completely not only ensures better results but also demonstrates your commitment to your craft. So take your time, let each layer dry thoroughly, and watch as your artwork comes alive with depth and richness.